Showing posts with label lighting. Show all posts

Sunday, August 16, 2020

Using Cell phones; seeing light and setting in your domestic environments


Although this tutorial is about the static self portrait, it gives so many great tips for how to set the scene - working with what you already have access to- your own domestic environment. 

These ideas are very simple- you can do it. Before you shoot, assess the setting you have to work with. 

Monday, November 26, 2018

More on lighting for different shades of skin

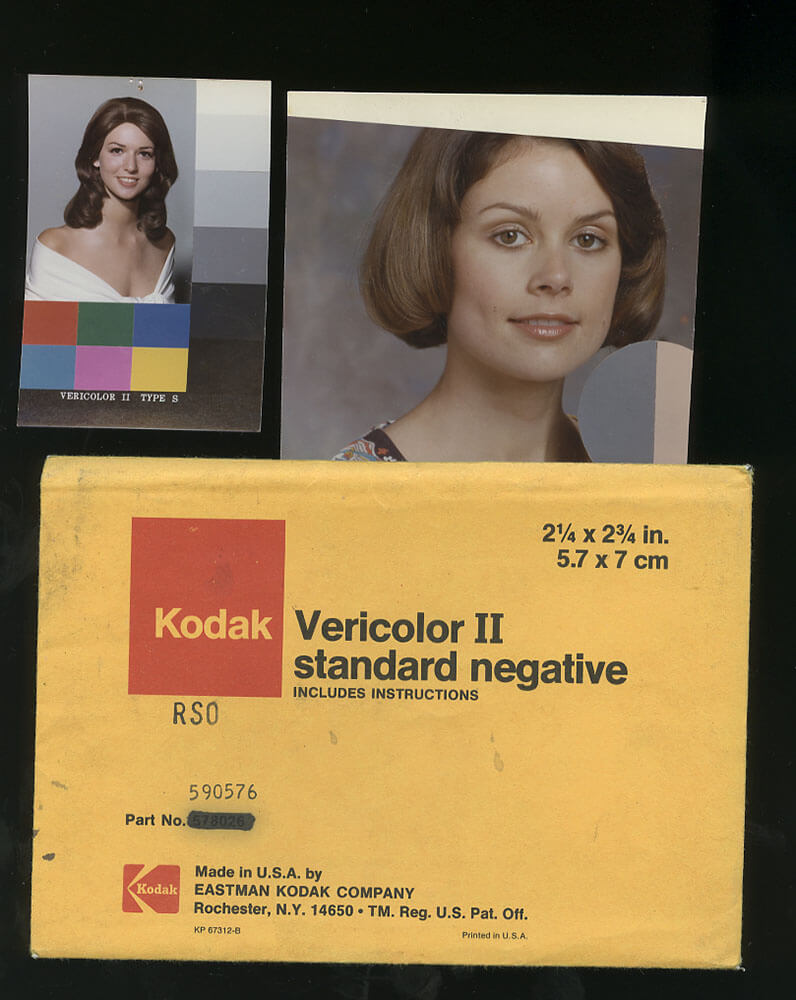
This is a good article that gives background behind how film stocks were created to make particular skin tones look realistic. 


Kodak Shirley card used to calibrate film cameras for various skin tones.

Sunday, November 25, 2018

Lighting for black people- what we can learn from Ava Duvernay!


People of a certain age (and certain hue) look back on old high school yearbook pictures with mixed feelings. Chances are, the more melanin you had, the less likely you would show up as anything more attractive than a smudge, a muddy smirk — or worse, a lurking presence — as you hovered in the back row of the chess club photo.

Part of the problem is that racism was built into film processing. Until the 1990s, professional film developers compared the skin tones in photographs against a universal guide known as “Shirley cards” which helped them figure out the right mix of chemicals to process a photo properly.
The Shirleys were always white and demure.

Wednesday, September 5, 2018

Using Zebras for film correct exposure

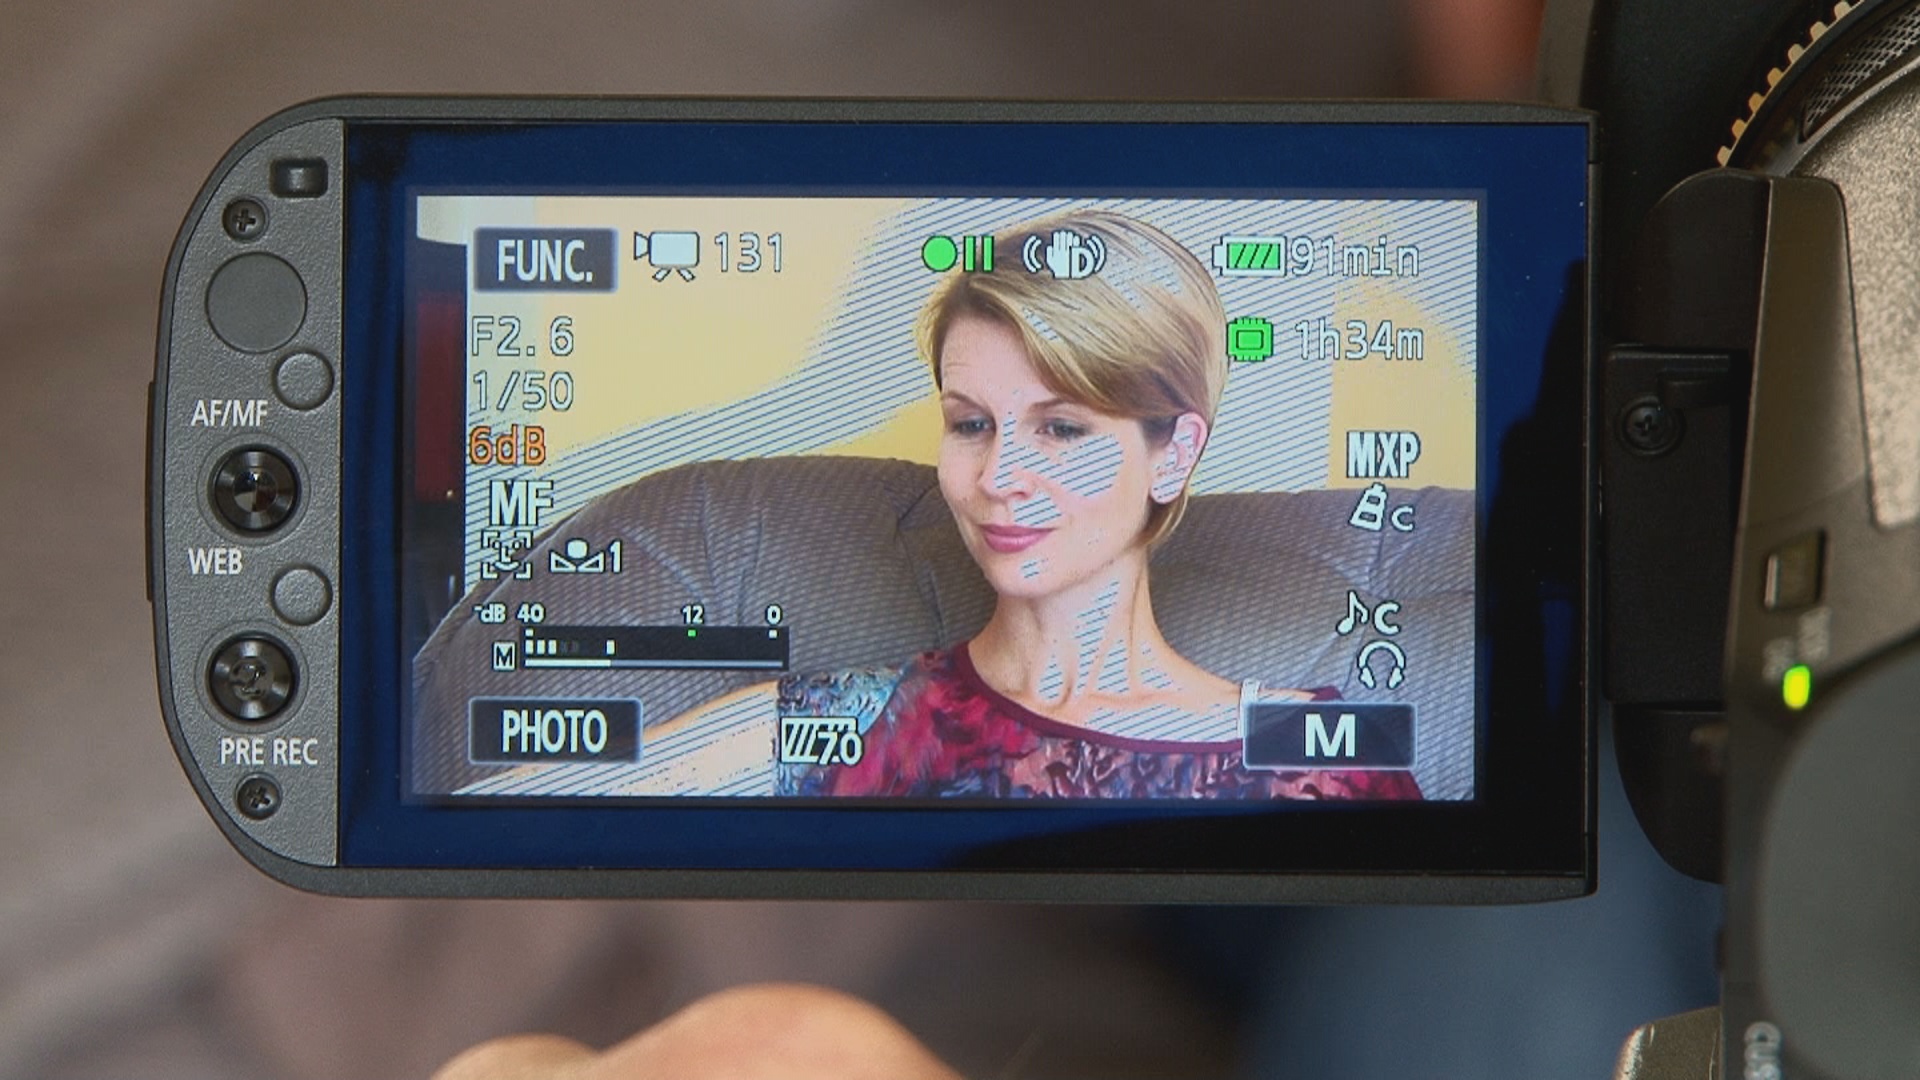
The zebra pattern is a guide for choosing the right brightness in a shot.
Learn where the Zebra button is on the HDR AX2000

When you select the zebra ON, the brightness level appears on the screen. It will not be recorded.
There should be some lines in your scene for it to be bright enough to record.
Lines in the brightest areas, say on the face, is a good indicator.

You can set the threshold of the Zebras to 70% or 100% or other values. The lower the number, the less sensitive they are-- useful for different complexions.. A lower value is better for people with darker complexions. Start by exposing at 70%

In the below image, it shows the lightest part of the scene, the sky.


If there are lines everywhere, or on more than half of the image, your scene is probably overexposed. Close down the IRIS, or change your aperture to AUTO.


Zebras covering the entire face means there is not enough shadow to show depth in the face.

Here's a good exposure. the IRE (zebra values) is set on 70%